Thursday, July 26, 2012

Zibits Robots

Today the kids took a trip to the Learning Expres Toy Store with their Nonna and brought home these cute new toys called "Zibits".  They are remote controlled mini robots.  The remote has one button like control.  Push it forward and the robot will move forward.  Pull the button back and the robot will spin in circles, thus changing the direction it goes when you make it move forward again.  You can collect all sorts of different robots, as well as tracks, playsets, and accessories.  It's like the Zhu Zhu pets of the future! 


Check them out at www.zibits.com

Wednesday, July 25, 2012

[DIY] Toddler Trundle Bed

I've been at it again in my girls' bedroom.  We did some rearranging in their room and in the process I came up with a space saving solution - a toddler trundle bed

Here's what our standard toddler bed looked like:  
Bergamo Colonnade Toddler Bed - White
Simply remove the headboard, and footboard, and side rails (just a few screws).
 Measure the width of the bed.
Then cut a 1x4 piece of wood to that measurement (mine was about 30" I think).  See wood ends in picture below. 
Attach with 2 screws in each corner to the bed base.  


Since you want the bed to slide in and out easily, you're going to need some wheels!  I had saved these wheels from some other piece of furniture or storage bin.  They came in quite handy.


First, cut a triangular piece for the wheel support.  I just used a 1x4 and cut each side at 45 degree angle, about 3" long on each side. 
Attach each triangle support with 2 screws into the base of the bed.  Then attach your wheels to the support.


Now just throw the mattress on top, and Ta-da!  A toddler size trundle bed.  All these pictures actually show the trundle under our bunk beds - which would be a great option if you had 3 kids in a room.  I originally had the trundle under just a single twin bed (before we put the beds together as bunk beds).  


This was a pretty simple modification to make.  I didn't even have to ruin any parts to the original toddler bed.  If we ever want to go back to that, we can just remove the custom ends and reattach the headboard and footboard.  I love options!

Tuesday, July 24, 2012

Teaching Communication to kids

In our home we do something each Monday night, called "Family Home Evening".  This is encouraged in our faith to help teach gospel principles and family values in our homes.  Sometimes we do gospel related lessons and other times we do fun activities that strengthen our family relationships.  My daughter will soon be baptized, so we decided to teach a lesson that will her better understand the importance of the Holy Ghost (spirit) in her life.  Without going into those specific lesson details, here's a summary of the activity we did with the kids that would make for a great lesson on communication or something similar.


We had a child sit on either side of a card table set on it's side.  This kept them from being able to see one another.

First, we gave each kid the same set of duplo blocks and told one of them to build a tower however they wanted to.  We then told the other child to go ahead and build what they thought matched the blocks on the other side.  This felt frustrating because they couldn't see anything on the other side and had no direction or instruction.


Second, the child was allowed to describe the tower to their sibling on the other side of the table and help them to try to match what they had built.  (This proved to be a great communication skill builder.  The kids learned quickly that they needed to be very specific and make careful descriptions).  They were so excited when they were able to match it exactly.  If they didn't, we went back over where something went wrong and discussed ways to explain it better - or maybe it was a listening issue.

Lastly, we had the children do the same thing as before, but this time my husband and I got out the toddler music bucket and started making all kinds of racket!  Obviously, this made it VERY difficult for the kids to communicate properly.  The child listening couldn't hear the instructions and both were exteremely annoyed and frustrtated.  This can be associated with things that distract us from listening well.

This activity was so fun for them.  They kept trying to make their buildings/towers more complicated to see if they could effectively communicate it to the other.


Apple - Nectarine Fruit Leathers


This year, we finally got a huge crop of Nectarines on our tree out back. They are delicious! And with some surplus, we decided to try to make a yummy snack - fruit leathers or fruit roll ups. I was mostly interested in an easy process since I decided to do this on the fly (as usual). I looked up a few resources for tips and ultimately did the following:

1. Removed pits, sliced nectarines (left skin on) - about 4 cups worth
2. Added nectarines, 1 jar of applesauce, and 2 Tbspn lemon juice to the blender and blended until smooth
3. Traced circles/cut out parchment paper to fit correctly on the humidifier trays
4. Poured fruit mixture onto trays and spread out with spatula
5. Plugged in dehydrator and waited a few hours...


And here's the final result. Yummy! We had a few trays get a little drier than I preferred, but it was a great trial run. Now, just cut and eat - or don't cut and just eat a giant fruit donut roll!

Wednesday, July 11, 2012

[Fitness] No more excuses!

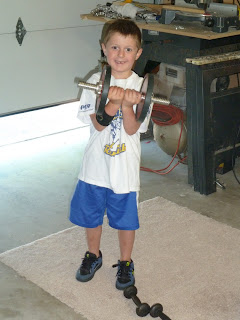
Summer makes it a little harder for mom to find a moment to herself.  These 3 little monkeys have been helping me achieve some fitness goals.  We've had a few garage workouts where I set up stations for the kids to do (mostly so I could do my workout  without being climbed all over)

Free weights


Stationary Bike


Mini Trampoline


I've also take a few trips to the park with the kids and attempted to get in a good workout while they played.  Try using a nearby bench for a quick fitness fix.

These 8 Bench moves from The Fitnessista are a great start.  You can do a workout while you watch your kids play at the park, right?  No more excuses.

Workout in the Park