Friday, May 18, 2012

[Build] Kinder Puppet Theater

My son's Kindergarten teacher had a wishlist of items for her classroom. One of them was a puppet theater.  They have a whole rack of puppets, but no theater to put on a show.  When I saw it online retailing for $70, I knew right away I could build something similar for a fraction of the cost.  It took me just a couple hours to build, everything from scraps in my garage.   


Another parent donated the fabric for the curtains.  Just a couple late nights of simple sewing and spray painting, "Luce Theater" was born.  The top sign was spray painted with chalkboard paint


 The kids also got to sign their name on the sides so she will always remember this year's class. 


BASIC PLANS FOR PUPPET THEATER

Finished front and back views


Step 1 - Build frame with 1x4s (3.5"x.75") pieces
2 - 19.5" long 
2- 24" long
Kreg jig or predrill for screws
*Also on your long pieces, this would be the perfect time to drill a spot for the dowel piece (picture at the end) if you plan on adding a curtain.  
Cut your dowel piece about 18.5" long
Drill a hole 1/4 of an inch depth into each 24" board about 2" from the top, centered. 
You can place dowel in when you build the frame or try to add it later. Probably best to secure now.


Step 2 - Add middle board
18"x 6" - attach with glue and screws on sides or just use brad nailer 
Center this board on the bottom board. There should be about 1 3/8" space on either side


 Step 3 - Cut out and attach "stage" piece
First, start with a board 18"x7".  Measure from the center of the board (at 9") to the halfway point on each side (3.5") and draw an arc between those points.  I did this by hand and just eyeballed it.  
Cut the arc with a jigsaw and sand down any uneven or rough edges.


 Step 4 - Add legs
Use a 1x4 and cut 2 pices at 7.5" long (7.5x3.5)
Measure 3.5" (1.75" on each side of center) and 1.75" from the bottom to mark your angles. 
Use chop saw to cut off each side angle. 
Attach each leg with glue and nail gun or at least 2 screws on each side


Step 5 - Add back ledge piece on BACK of theater
(back side is whichever side the "stage" (rounded top piece) is NOT facing
This piece helps hold in chalk or eraser
Cut a 1x2 @ 19.5" long and attach to the bottom of the frame using glue and brad nails


All finished!  
If you haven't added your dowel piece yet, do that now.  
This project would be easier to paint or stain before screwing/nailing together. Remember to paint front and or back parts with chalkboard paint if you want to be able to write on your theater.  


Tuesday, March 27, 2012

[Financial] You Need A Budget


Maybe you've just finished your taxes and are tired of thinking about money, but let's just face the facts. Money is part of life. Some of us have it, some not as much, and some just pretend they do. Everyone needs money management tools of some kind. My grandparents first introduced me to the "envelope system". Now, I know that system would work - that's IF you actually cut up or buried all your credit and debit cards.

We live in a world of fast-paced, convenience. That's one major reason there's so many people struggling financially.ou physically put an allotted amount of money into different envelope categories. And then, when you've used all the money in your envelope, that's it - you can't spend anymore.

A few years ago I was on the hunt to find some kind of system that would work for me. There are so many software programs out there that have great potential - but what most were missing was the fundamental rules of budgeting and education to go with it. Managing your money takes discipline! You can't expect to change spending behaviors or have an intimate knowledge of your finances if you simply sit back and let a software program download your bank information or just by logging in your online bank account to check your balance and make sure you still had money in the bank. Admittedly, when we had two incomes and no kids, that was my way of managing money. I just did my best not to spend too much and I just made sure that I money in the checking account to cover all the bills. And the bills...those were set up in the auto bill-pay so I didn't have to worry about that either!

Fast forward a several years later, now with only one reliable income, a hefty mortgage, and three kids - we have a lot more to "manage". So, I set off to find some helpful financial tools - that's when I found YNAB - "You need A Budget".

This is a fantastic resource for managing your money so you know exactly what every dollar is being used for. It does take some discipline -and some learning in the beginning so you understand the software. The greatest part is that there's free online classes, demos, and forums so you can get all the info you need. Plus, I'm pretty sure they do a free trial of the software so you can give it a good trial run.

The main purpose idea that sets this method aside from others is that the goal is to start living on last month's income. So, instead of waiting to get your paycheck so you can pay your bills, you create a buffer (over time) that allows you to already have that cashflow on hand without worrying about whether or not you can pay a bill. You PLAN AHEAD and budget for all your future expenses and even create a cushion for those that are unexpected.

Here's a link to the story behind YNAB and why/how it was created: http://www.youneedabudget.com/company


Just go to YNAB's site and take a look around so you can get a feel for what it's all about. I have used this system for the last few years and I think it has helped me really stick to a budget. Of course, I have fallen off the wagon here and there, but it's not too hard to pick up where you left off and keep going.


Saturday, March 10, 2012

[Project]: Girls Room

Girls' Room

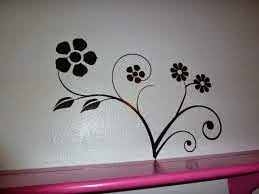
Our girls are 5 years apart and since they now share a room, we did a little updating so everything fit in the room a little better.  We painted the room a light grey, added some vinyl flower decals on the wall, and refinished a large dresser for them to share.  


Here is what the original dresser pretty much looked like. I forgot to take "before" pictures of it, but this gives you an idea of the traditional brown stain with gold handles. To give it a more modern look, we spray painted the handles with a "silver metal" finish and painted the dresser black (with a final coat of poly urethane).

Thursday, February 9, 2012

A Valentine Wreath

Paper is an amazing tool! It comes in so many forms, colors, thicknesses, and you can cut it any way you like it. Here's a great way to create a little love in your home for Valentine's day.

This simple paper wreath was created over at "the hybrid chick". I think my door is calling for a little facelift this month.


For more Valentine crafts for kids, visit the top 15 ideas posted by Parenting.com

[Appliances] Dishwasher Tune Up

Here's some great info I found over at "The Quick & the Hungry" blog by Cindy. If your dishwasher is in need of a little TLC, then this just might help you out.

Here's what Cindy had to say:

"Over the past 6 months my dishwasher has steadily stopped washing my dishes well. It started with the glass cups, leaving food on the inside, then got worse and worse until two weeks ago when nothing was coming out clean and was actually dirtier than when it when in. Then to top it off, it started leaking like crazy! Arg! This happened in our old home and we ended up selling our home with a brand new dishwasher.
Well, we just financed a fence for our new home and I did NOT want to tack on another $450 to our Home Depot credit card. So, what's a gal to do? Clean baby clean."


To see the steps needed to do this in about 15min, be sure to visit The Quick & The Hungry blog to get all the details!